Melbourne City 1 - 1 Western Sydney Wanderers
Melbourne City came into the game with a clear tactical gameplan against a defensive/counter-attacking Western Sydney Wanderers, in a game characterised by a lack of individual quality.
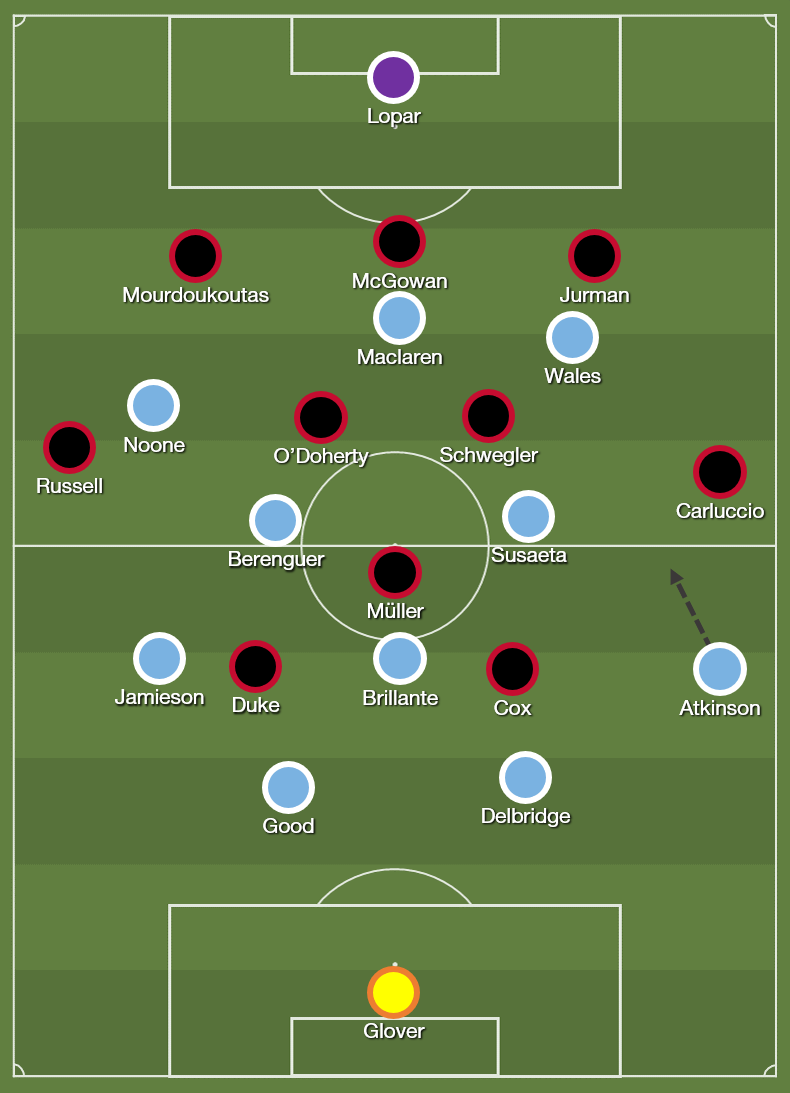
City lined up in a fairly attacking 4-3-3. Maclaren played centrally and ran the channels, with Wales staying high and wide right, with Noone given a bit more license to come deeper and centrally. The two central midfielders Berenguer and Susaeta were also given license to go forward and wide, while Brillante stayed in front of the back four. Jamieson and Atkinson also came forward to support the attack.
Wanderers played in a 3-4-1-2. Müller played close to Duke and Cox, the wingbacks came forward whenever they had the ball, and the remaining five forming a solid and tight unit in the middle. The outside centrebacks played quite wide, presumably to match the starting width of the City wingers.
Melbourne City playing out from the back
City wanted to play out from the back, and Wanderers attempted to stop this with the three narrow attackers matched up positionally against the trio of Good, Delbridge and Brillante. Atkinson dropped into the right-centreback position, while Jamieson stepped into central defensive midfield to the same line as Brillante. Further forward, Berenguer and Susaeta roamed freely in midfield, able to stay central, or go slightly wider to find space. Maclaren and Wales generally stayed higher up, with Noone coming short to the left which had been vacated by Jamieson. In build up, this looked something like a 3-2-2-3.
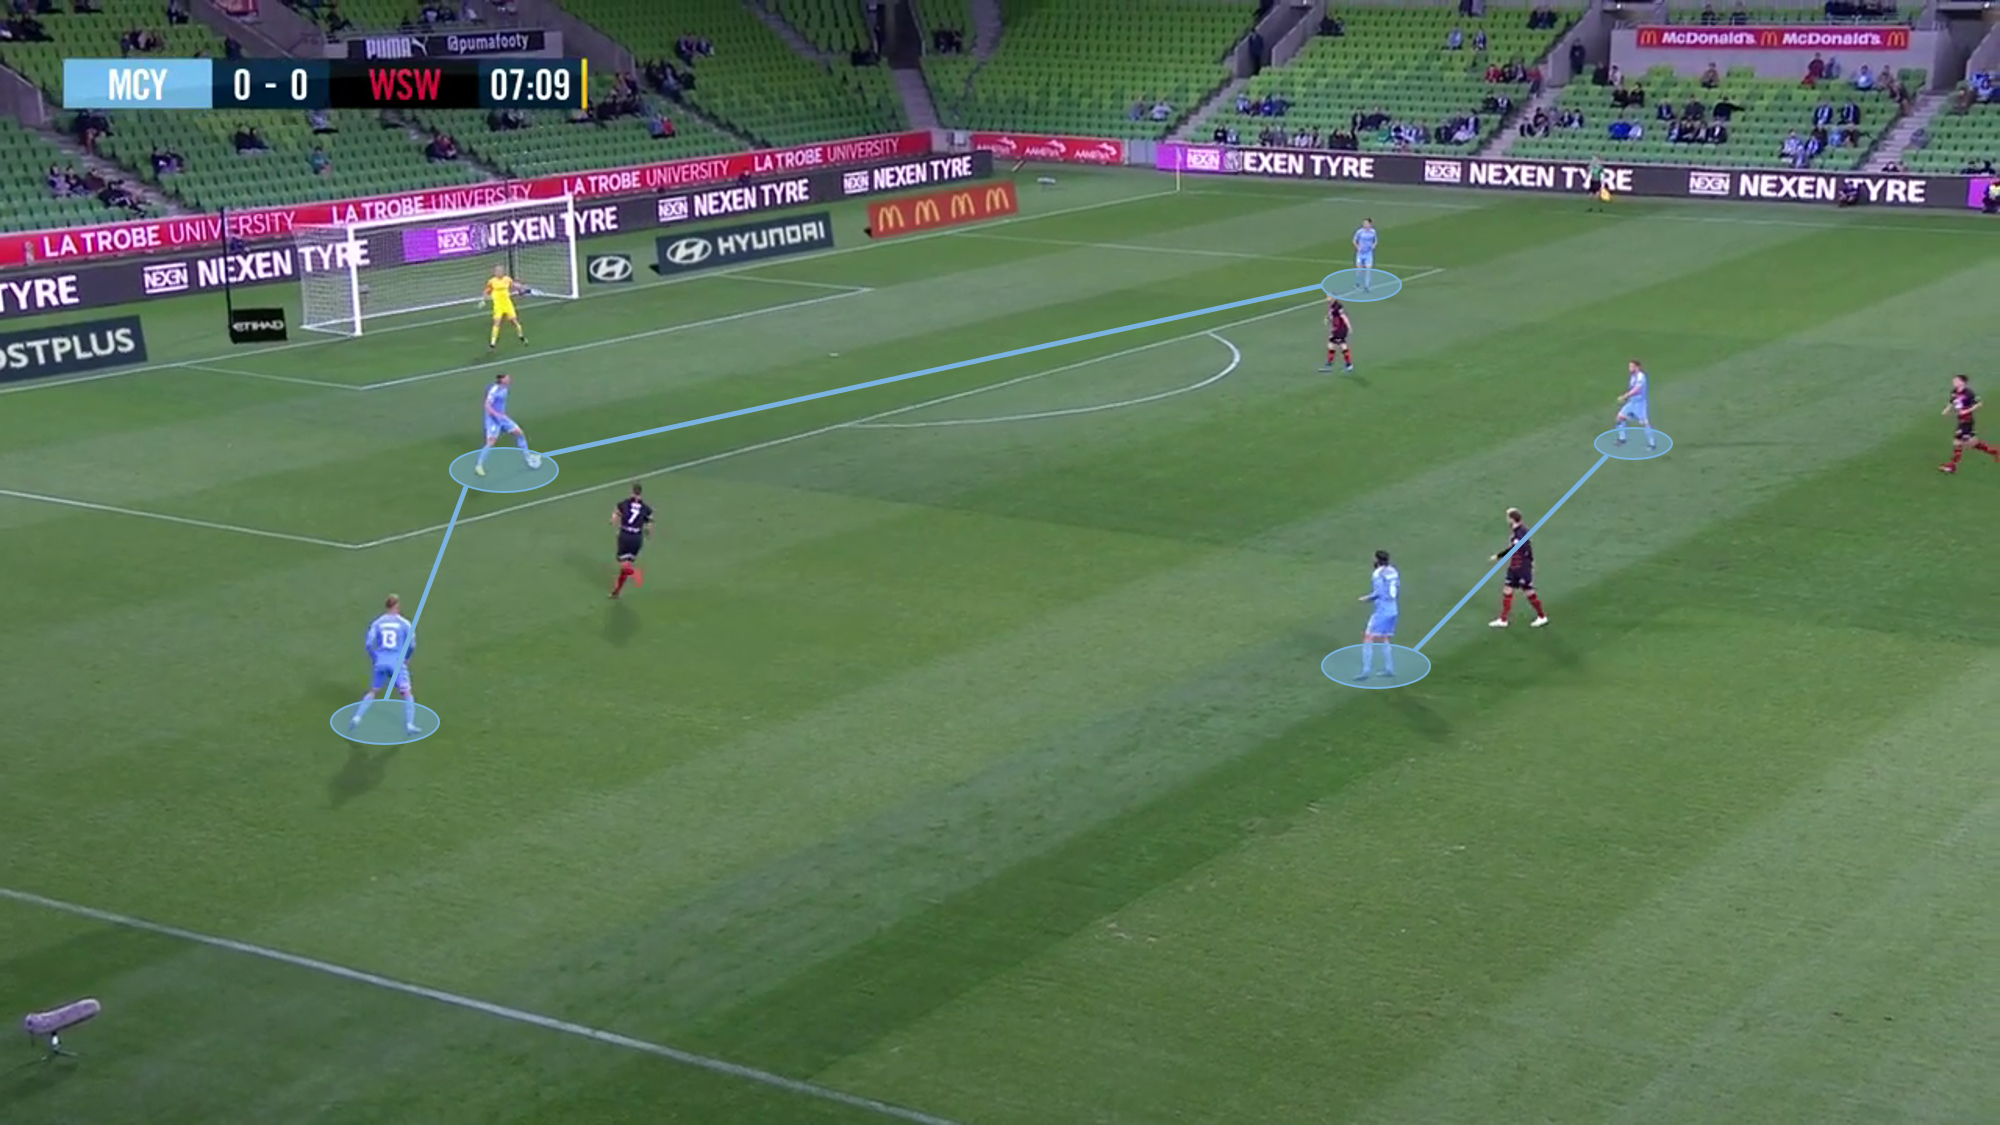
This meant that for Wanderers to press, they needed to do a few things:
1. Cover both Brillante and Jamieson in the centre of midfield
Natural positions meant that there was a 2v1 in this space - Jamieson and Brillante against Müller. To even this up, either the central midfielders would have to come out (which would allow Berenguer/Susaeta to be free), or Russell would have to come out from right-wingback into the middle (which would open up space behind him).
2. Press Atkinson (positioned at RCB)
Atkinson had a dual threat - he was able to play long balls down the channels, as well as dribble forward into space. To press him, either they had to shift the attackers over to the right (which would open up the opposite side), or push the left wingback Carluccio high up (which would open up space behind him in the channel)
3. Cover Noone and Berenguer on the left wing
Noone and Berenguer popped up on the left in the space vacated by Jamieson. Russell (at right-wingback) and Mourdoukoutas needed to coordinate to cover them - which often meant that Mourdoukoutas would step out of the defensive line.
Naturally, a lot of the responses varied based on the scenario that they found themselves in, but in general, three things happened:
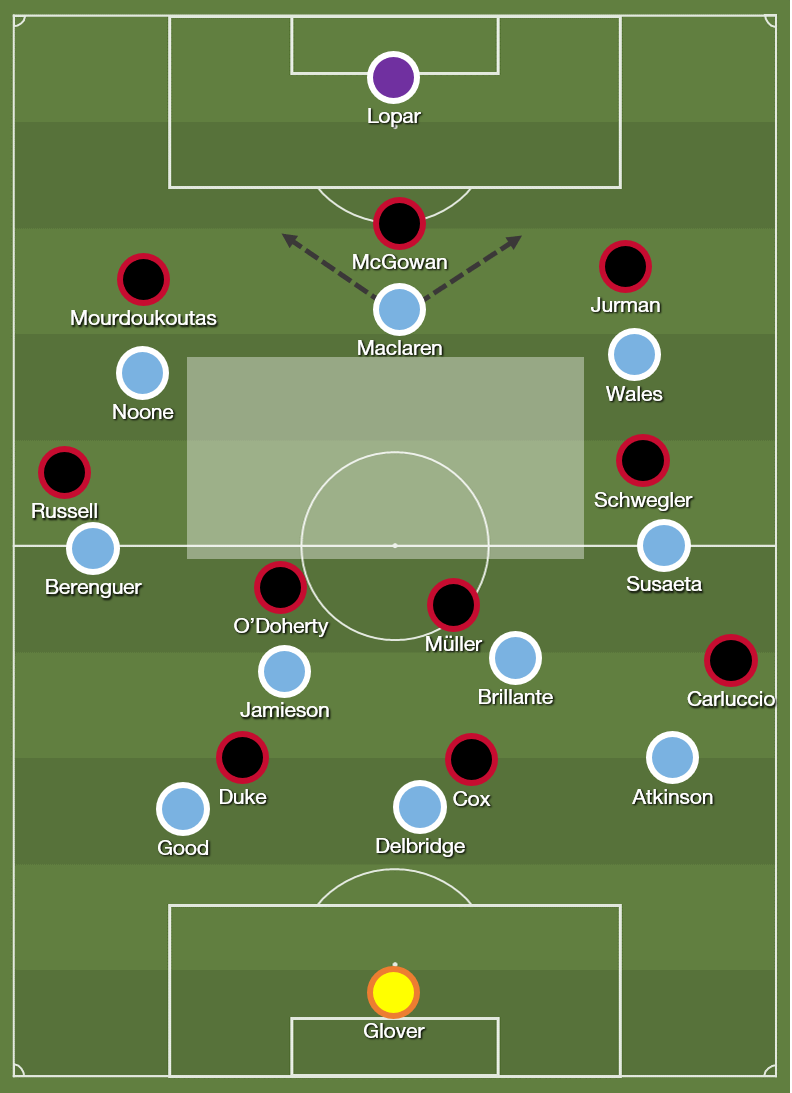
1. The middle of the pitch behind the press was fairly vacant, due to the central midfielders being pulled wide and/or high up the pitch, and the centrebacks being pinned by the forward line. Brillante could push up into this space to receive the ball behind the press, while Atkinson could carry the ball by dribbling into the large amount of space. Further forward, the attackers could drop into the hole to receive the ball in space
2. Space in the channels - wingbacks were high up the pitch, meaning that there was space in the channels that had to be covered by the outside centrebacks, and Mourdoukoutas came out to track Noone as he dropped deep. It became a 2v2 up front; Maclaren and Wales vs McGowan and Jurman. With the outside centrebacks kept busy by Noone and Wales, Maclaren would run into the channels behind them, looking to latch onto balls played into the channels. The space behind Maclaren would be empty, so the wide attackers would look to run into the space left behind, just outside the 18-yard box.
3. Confusion over coverage in the ‘hole’ - when the ball bypassed the midfield press, there was time and space just outside the 18-yard box. The central midfielders were often pulled out of position, and the wingbacks would sit just outside the centrebacks to form a line of 5. City had a bit of time on the ball in this space, as Atkinson and Jamieson both underlapped and occupied these spaces, without direct opponents in this area. With Berenguer and Susaeta joining in, City could work overlaps to create crossing positions, shoot, or play a cutback to the edge of the box. Wanderers had to send back one or two of their three attackers to help provide the numbers to defend these spaces.
Wanderers direct
With City dominating possession, Wanderers’ play on the counter was key, and they aimed to hit the ball long to the strikers. The idea was that the three attackers would be in close proximity to each other to win the long ball/second ball and then drive towards goal. While Cox managed to win 6 out of his 7 aerial duels, the layoffs to and support from his teammates was lacking. This wasn’t helped by the attackers having to come fairly deep to help with defence.
In possession, play was focused on the flanks, through the wingbacks pushing up (video). They looked to receive the ball wide, then look inside to combine with the three attackers, but the interplay was quite poor, which was aided by City’s numbers in midfield. As such, in the first half, it looked like a very rigid team, with 7 focused on defence and 3 focused on attack, without much linking play.
The goal they scored seemed like exactly the kind of goal they were set up for - a long ball up into the striker, switch of play to the onrushing wingback, quick passing exchange to get into space through a defence stretched by the 3 attackers.
In the second half, the wingbacks pushed up higher faster, to help out on the break. They found themselves on the end of long balls more often, but again, the interplay found itself lacking, and they struggled to maintain possession.